Learn how to automatically add scene and page numbers in Final Draft 10.
Jump to:
Assigning scene and page numbers to your script is a very important part of the pre-production and production phase of your project because after a certain point page and scene numbers cannot change anymore. This is because everyone in the production department and in other departments has to rely on this information. Otherwise it would be impossible to make sure that everyone is literally on the same page when planning and carrying out certain tasks like prepping sets, costumes, visual effects and other stuff.
So, how does this work when changes are made to the script, after scene and page numbers have been locked for production?
Once a script goes into pre-production, the page and scene numbers are locked and are not changed. So, when certain scene are changed afterward the corresponding pages are called “revisions” or “revised pages”.
“Locking” and “revisions” will be covered in another article, but it is important for you to know that scene and page numbers usually are used in connection with a locked script in revision mode.
Automatic Scene Numbers in Final Draft 10
So, let’s see how the numbering of scenes and pages works inside of Final Draft 10.
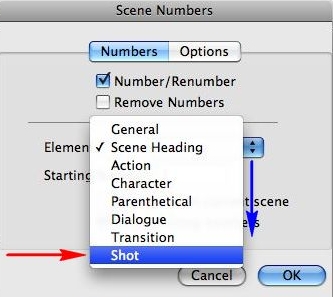
To add scene numbers, go to “Production – Scene Numbers”.

Choose the element you want to add numbering to, in this case that’s “Scenes”.
You have two choices of numbering available here, please check with your production department which of the two they want to use.
Then choose, with which number you want to start, usually this will be “1”.
You can start numbering from the current scene if you want. If this box is not checked, numbering will start at the beginning of your script with your first scene.
If you’ve numbered any scenes before and you want to keep their numbers intact, check this box here, “Keep existing numbers”.
In the options tab you can check or uncheck whether you want the number to appear on the left, the right, or on both sides of the page.
And, in case you want to use a different font you can do so.
Page Numbers
To add page numbers in Final Draft, go to “Document – Header and Footer…”. Final Draft opens up a simple dialog, that has three tabs: Header, Footer, and Options.

Just select the tab where you want to place your page numbers and place the cursor on the left side, in the middle, or on the right side in the text field below, depending on where you want your page numbers to appear.
And then, just click on the “Page” – button. Basically that’s it. If you want you can add additional text elements, like a dot next to the page number.
In the options tab you can choose, whether you want to show your header or footer, and if you want to have it shown on the first page. Also, you can enter the page number on where to start.
If you want to learn more about software for writers, look for more articles and videos on writersterritory.com or on my YouTube channel.
If you’re missing something, drop me a quick message and tell me what you’ve been looking for that I should include in future articles and videos.
If you like this article and you’re here for the first time please subscribe to my newsletter. I want to help you find the perfect writing software for you and help you with problems and questions you might have about the software you already own, so you can go back to your writing as quickly as possible and spread the important stories and messages you want to share with others and hopefully enrich other peoples lives.
If you want to get in contact with me, the links are down below, just drop me a message and I’ll respond as quickly as I can.
Have fun writing everybody. See you. Bye.


