In this article, I’ll review the iOS version of Scrivener that’s been released on the 20th of July 2016.
The first time Scrivener for iOS has been officially announced on the Literature and Latte website was in December 2011.
So, I’m happy it has finally arrived and I’m gonna give you a quick overview of what it can do.
I’m going to look at the following:
-
Syncing
-
The Binder
-
The Draft Navigator (“Scrivenings”)
-
Changing View Size
-
Side by Side editing
-
The Corkboard
-
Screenwriting
I’ve been using Scrivener on my iMac so far and my worries concerning the iOS version were
-
is there going to be enough real estate on a mobile device, especially when you’re working with multiple documents, and
-
what is the syncing process going to be.
Before we dive into it, be aware that you need to update to Scrivener 2.8 on your MAC in order to have the SYNC function.
SYNCING
So, let’s start with that right off the bat. How does Syncing work?
Let’s address the elephant in the room upfront. There is NO iCloud syncing. And that’s because Scrivener projects are in and of itself kind of a database that holds all your single documents. Every time you change one of them, that file is updated and needs to be synced.
Now, Literature and Latte say, iCloud syncing is simply not sophisticated enough to give Scrivener enough control over when which file is going to be synced, and that’s a problem and basically could mess up your project.
So, instead, Scrivener for iOS syncs with Dropbox.
To set up sync on your iOS device, tap the SYNC button and choose to link to Dropbox.
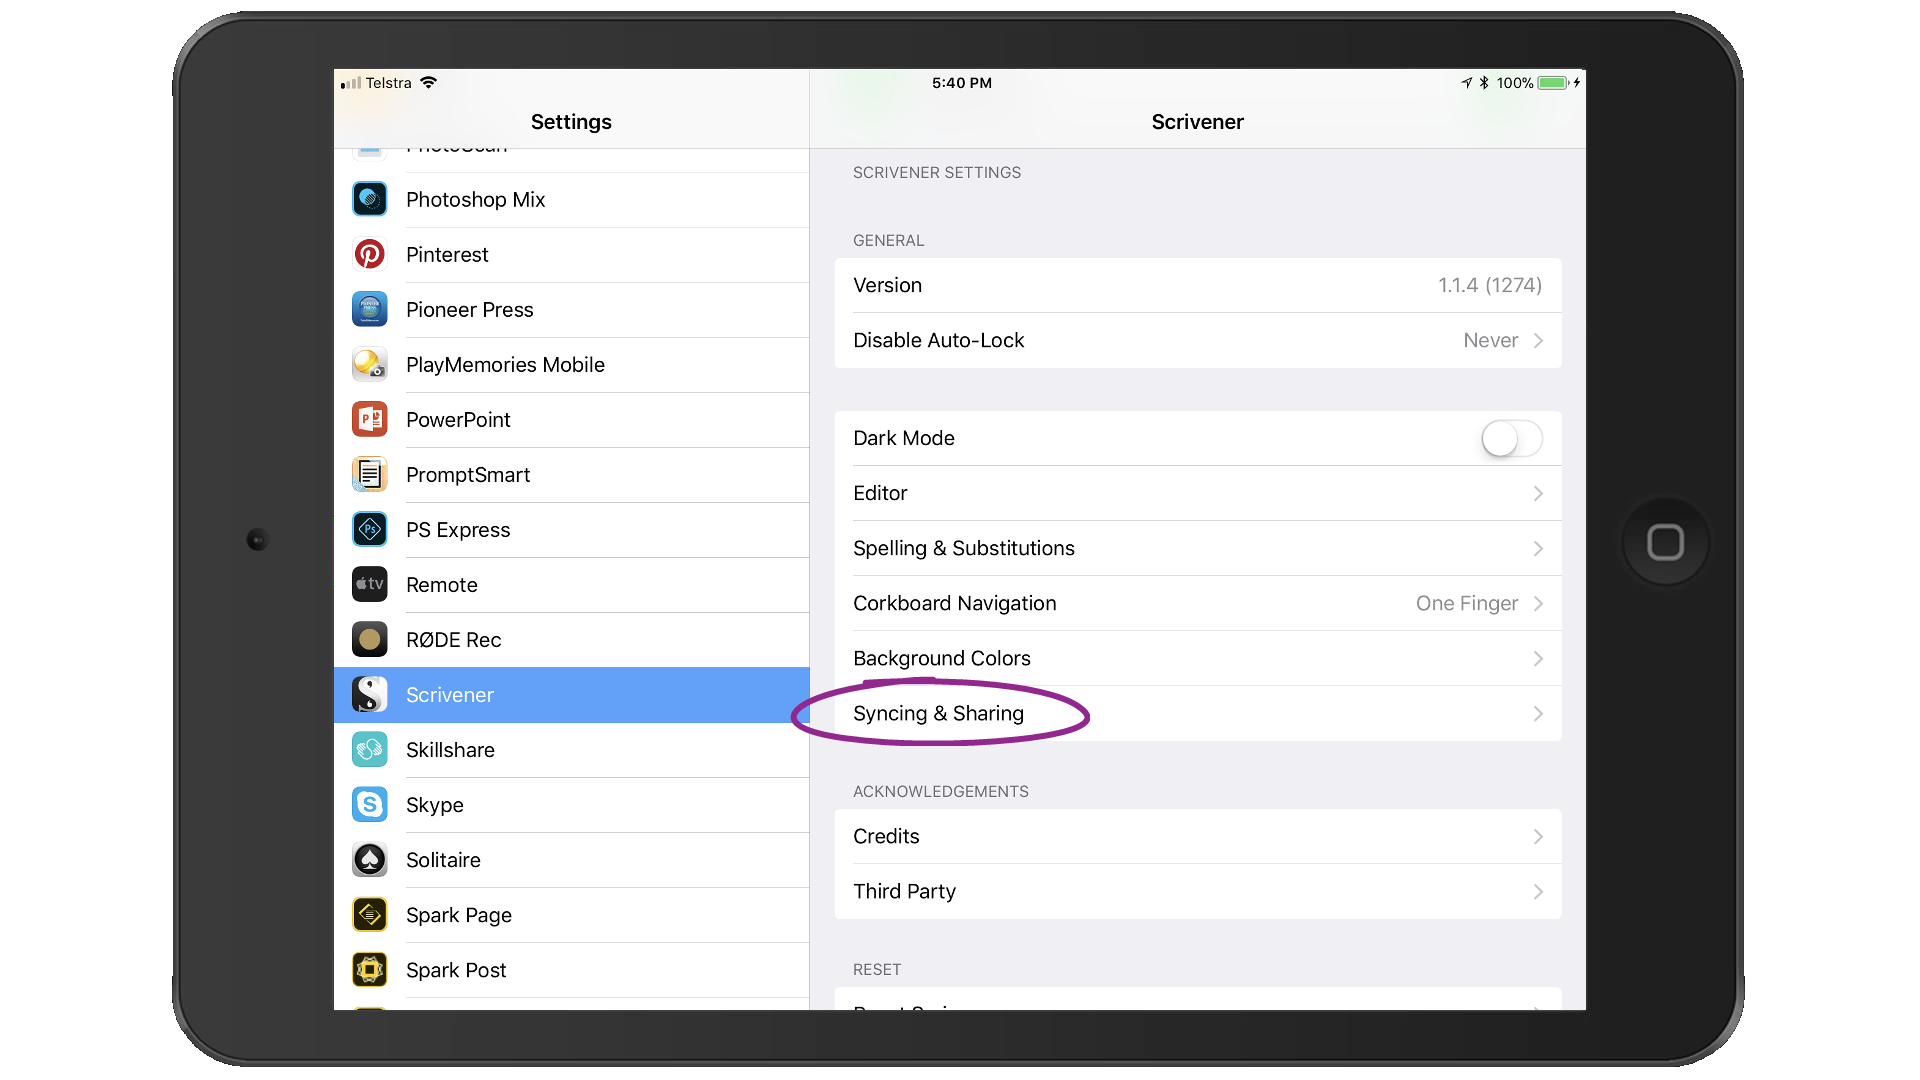
Once you’ve done that, Scrivener will ask you which folder you want to sync. The default is a Scrivener folder in your Apps folder, but you can choose any other folder you like.
Once you’ve selected the folder, Scrivener will sync all those files with the corresponding folder on your MAC or Windows machine. Which means, you only want to have Scrivener projects in that folder, nothing else.
When sync is setup and you create a new project on your iOS device you can choose between storing it in your Dropbox folder and having it synced, or storing it locally.
Of course you can also drag and drop your files into iTunes via USB transfer, if that’s what you want to do. But keep in mind that those projects are not synced automatically back to your MAC or Windows machine.
THE BINDER
In order to show you what the binder in iOS can do let’s first go to settings – by tapping the gear icon in the lower left corner of the sidebar – and let’s activate those options:
-
Show Labels
-
Tint Rows with Label Colors
-
Show Status
-
Show Synopses
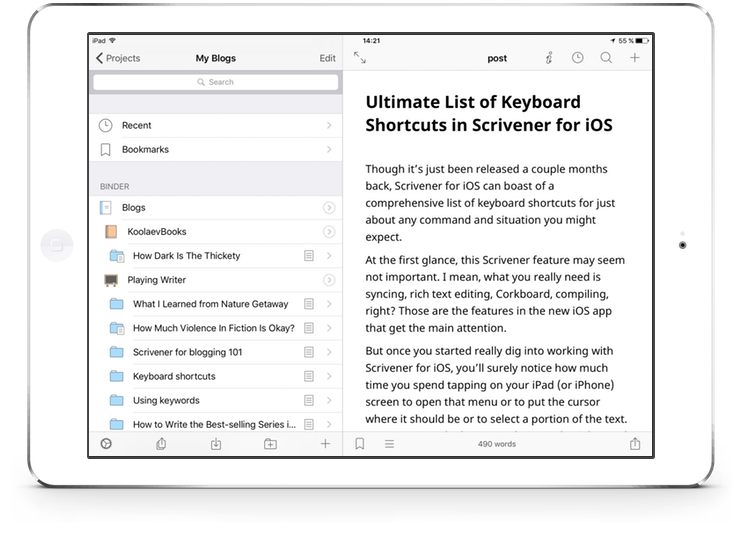
OK, back to the binder. If you tap a document in the binder, it’s opened in the editor. Tap and hold to open the inspector window.
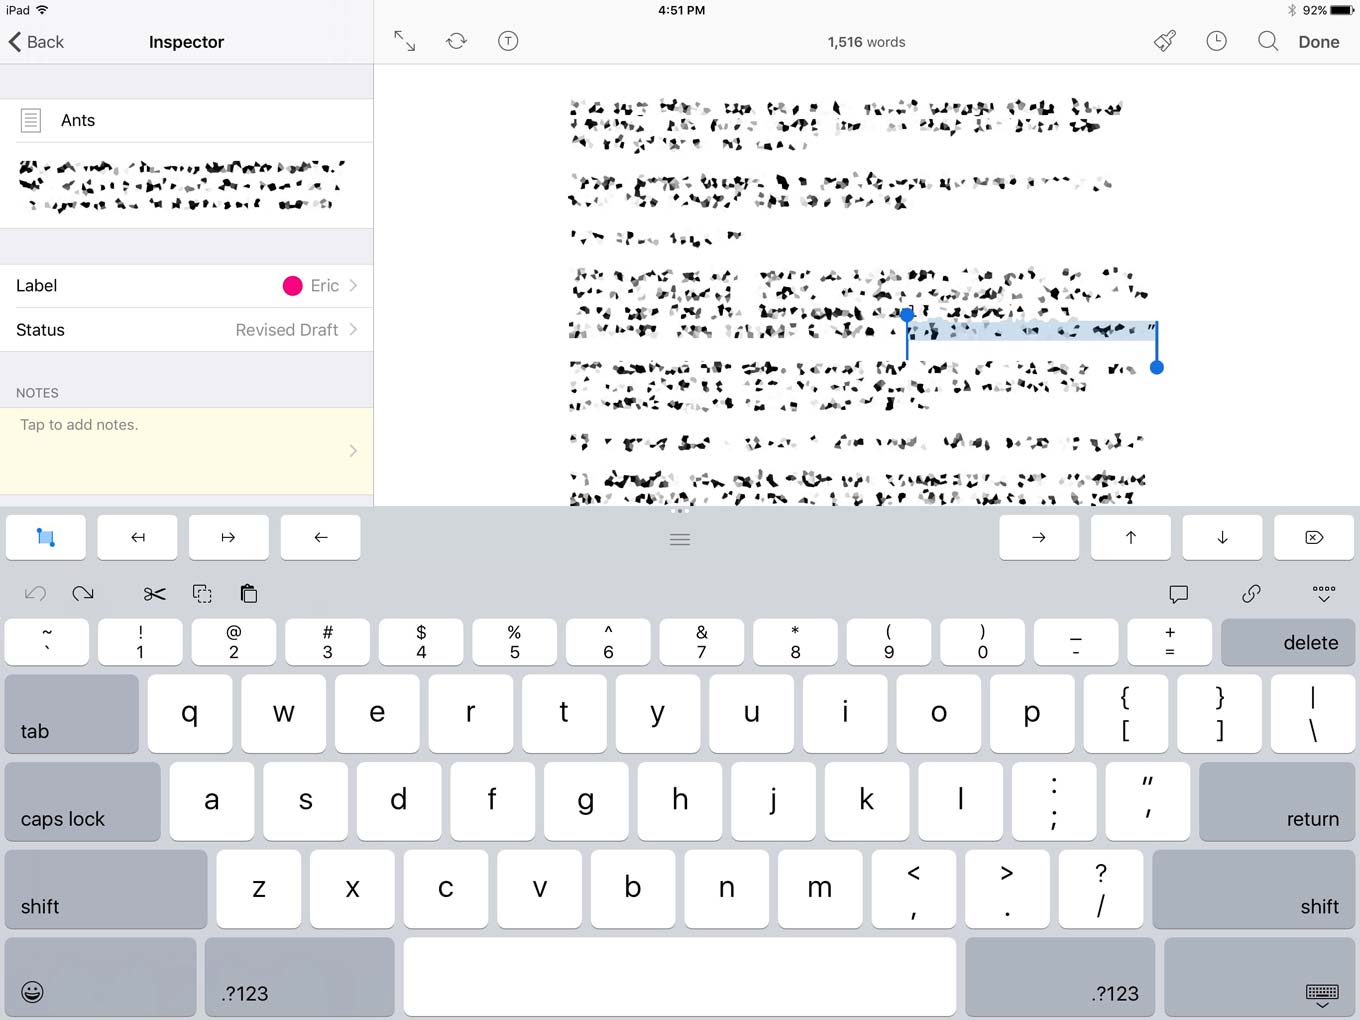
Like in the MAC or Windows version you can edit title and synopsis, add documents, notes, and the like. Since we have activated “Tint Rows with Label Colors” we can assign a label and see the color reflected in the binder.
Now, I’m guessing that on your MAC or Windows machine you’re used to having multiple levels of files and folders open at once. Since the screen real estate of mobile devices is a little bit more limited, this can be a problem here. Or not. Depending on how many files you have and how you like to work with Scrivener.
That’s why the iOS version gives you two choices here. You can tap on a folder to reveal its subdocuments. This will allow you to focus on this specific set of documents, but all of a sudden the rest of the binder is hidden.
If you want to use it more like the MAC or Windows version, without drilling down into one specific folder, swipe left on the folder you want to open and you’re presented with a menu.
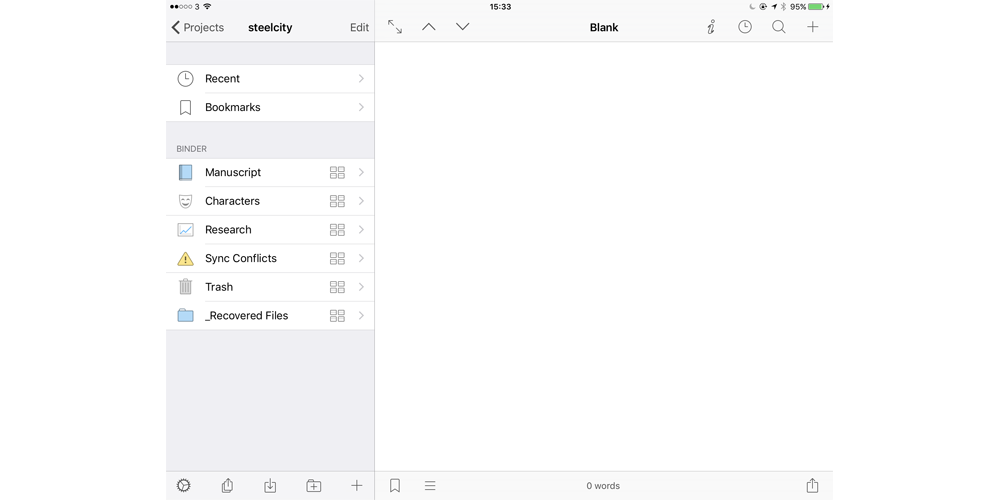
Now choose EXPAND and all the subdocuments of that folder will be revealed.

If you now hit the EDIT button in the binder navigation bar you can move documents around. Just press and hold them and drag them to their new position. You can also do that using the MOVE button in the menu if you swipe left on that document.
DRAFT NAVIGATOR
OK, now let’s look at how we can deal with scrivenings in the iOS version, and that’s where the DRAFT NAVIGATOR comes in.
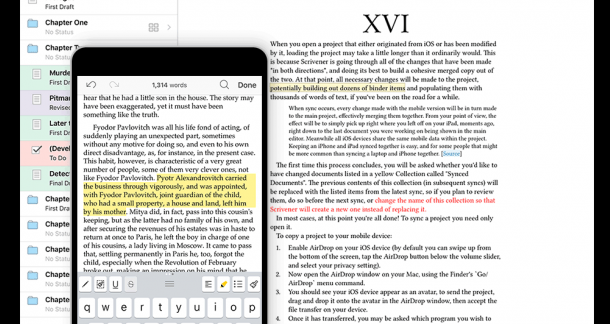
This feature is not available on the iPhone. Because of the limited screen size you can’t see much of a context anyway.
On the iPad the draft navigator more or less does what the scrivenings mode on the full version does. It shows you the contents of your draft folder in a continuous flow and you can either scroll or jump back and forth between documents with the chevrons.
To load a document into the main editor, simply tap it. To edit it, double tap at the place you want to edit and the document will be loaded into the editor and you can make your changes.
CHANGING VIEW SIZE
Changing the view size of your document in Scrivener for iOS is very simple, just pinch and zoom. That’s it. Easy peasy.
SIDE BY SIDE EDITING
Often when you’re writing you need to refer to another document so you want to have it open side by side.
The iOS version of Scrivener can do that, just swipe left on a document in the binder, tap MORE and select QUICK REFERENCE.
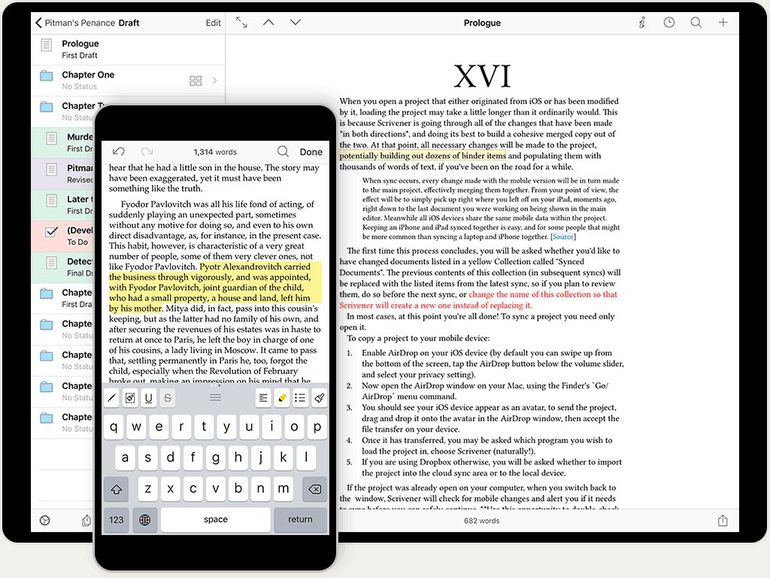
The document you selected replaces the binder so you can refer to it while you’re writing. You can also make the sidebar wider if you want.
If you’re working with the corkboard you can swipe left on a card to send it to the sidebar as a quick reference.
CORKBOARD
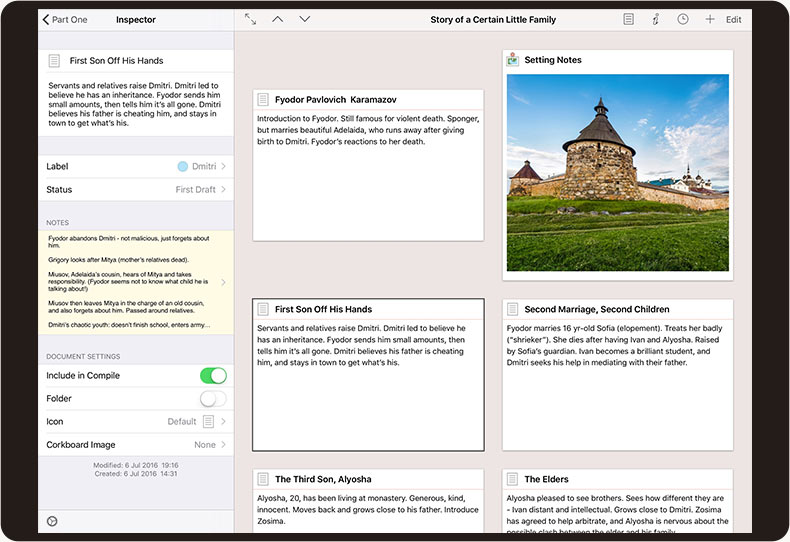
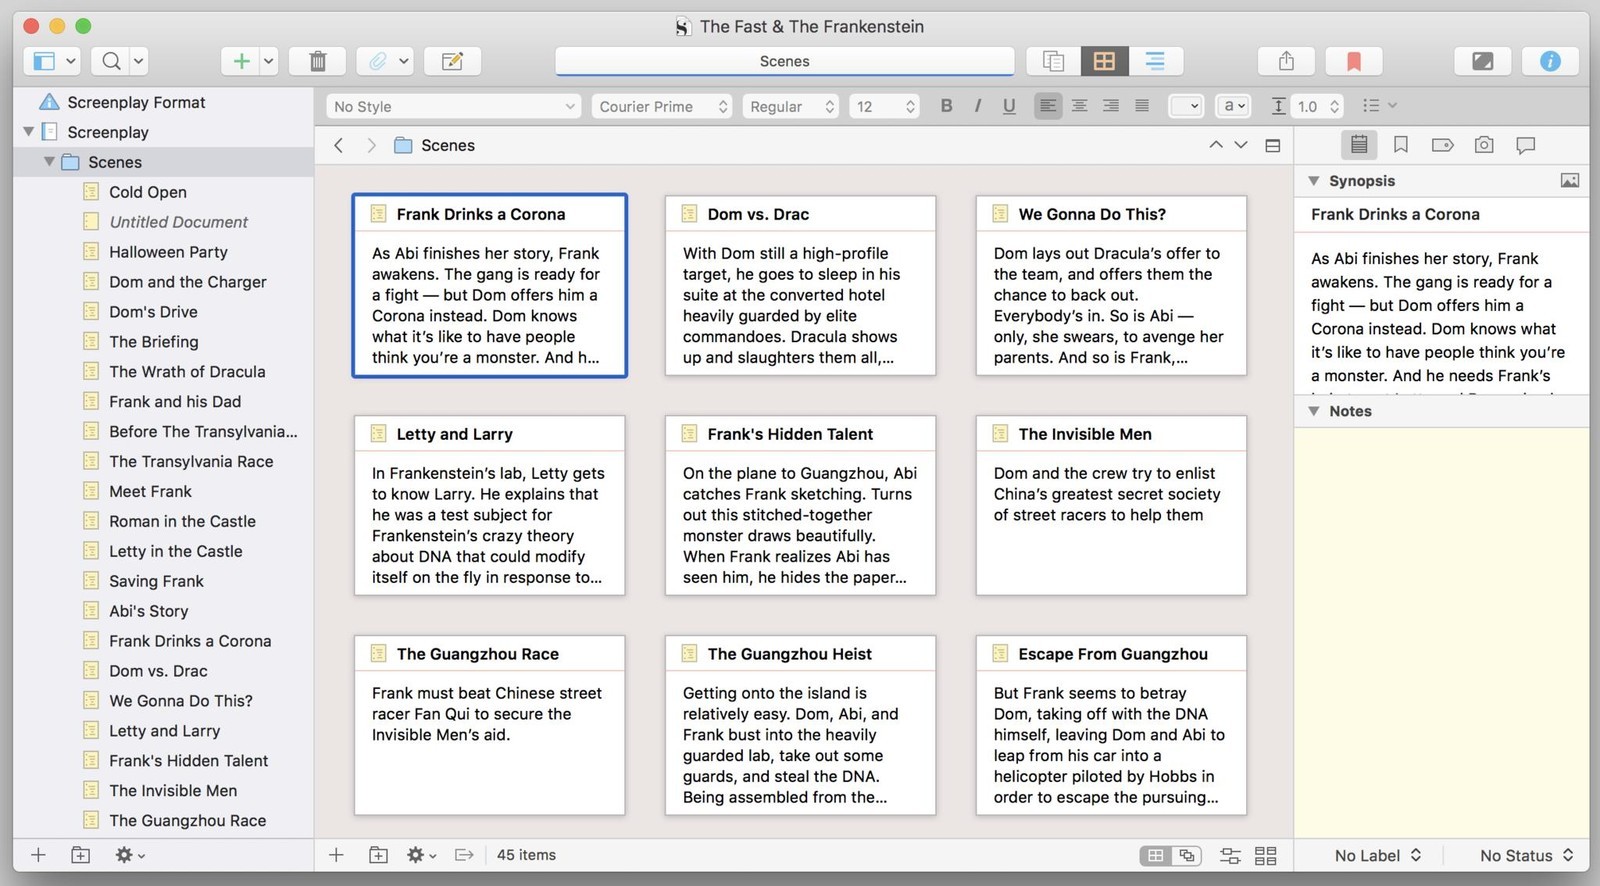
Speaking of the corkboard. To get to the corkboard view tap the corkboard icon next to a group and the subdocuments will be displayed as index cards in the editor.
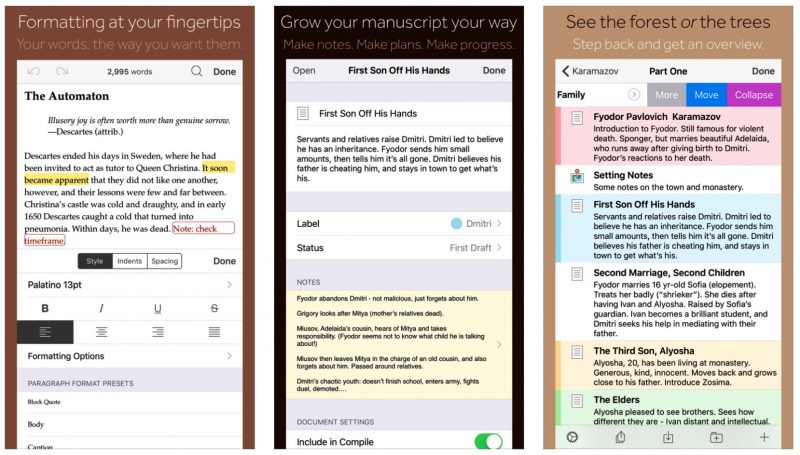
If the group is already open you can tap anywhere in the group row except on the circled chevron. The cards show each document’s title and synopsis, or, if there isn’t any synopsis they show a preview of the document’s content. You can also assign an image to be shown for a document instead of its text.
In the corkboard you can drag cards around, reorder them or make them bigger or smaller with the pinching gesture. You can also add new documents, delete them, merge them, or move them.
If you tap a card, the document is loaded into the editor. If you swipe left – as shown before – you can use it as quick reference. Double tap opens the inspector if you want to edit title, synopsis, status, et cetera.
You can also open the inspector by tapping the “i” button in the editor navigation bar so you can leave it open right next to your corkboard.
SCREENWRITING
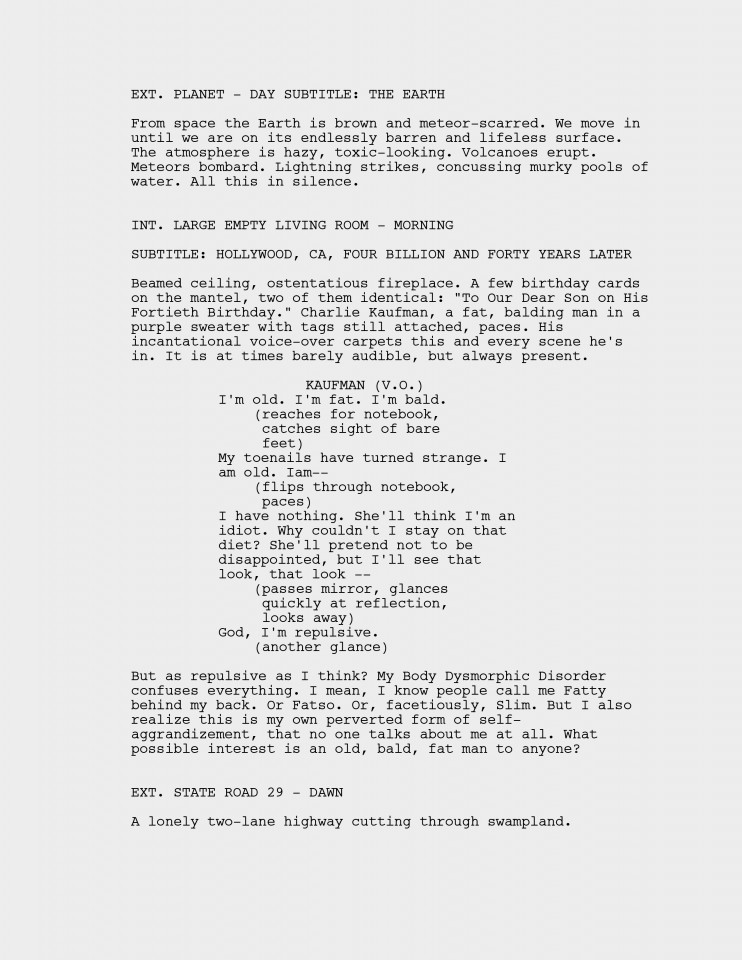
Scrivener for iOS can also do screenwriting, which is great news for people like me who use it maybe 90% of the time for writing scripts.
To turn screenwriting mode on you need to go to the project settings. Having done that you can decide whether each of the documents shall be a script document or not. Projects that are created on the iOS device and only used there can only be formatted with the standard SCREENPLAY template. However, if you bring a project over from your big machine or you sync it back and forth, you can change the formatting settings and the iOS version will honor that.
The screenwriting mode works like just in any other screenwriting application, you can jump from element to element using TAB and RETURN, or, alternatively, pick and choose the elements from the dropdown list at the top of the screen.
CONCLUSION
Alright, I hope you got an overview of what Scrivener for iOS can do and if it’s worth buying it. If not, watch out for more articles and videos about it on writersterritory.com or on my YouTube channel so you can make up your mind.
My verdict?
It can do everything I hoped it could and then some. I think Lit’n’Lat did an incredible job at porting that software over to a mobile format while retaining 100% compatibility with the big versions on MAC and Windows.
So, is it worth it?
Yes, it is. It’s 20 bucks well spent. You should get one.
If you want to learn more about Scrivener, look for more articles and videos on writersterritory.com or on my YouTube channel.
If you’re missing something, drop me a quick message and tell me what you’ve been looking for that I should include in future articles and videos.
If you like this article and you’re here for the first time please subscribe to my newsletter. I want to help you find the perfect writing software for you and help you with problems and questions you might have about the software you already own, so you can go back to your writing as quickly as possible and spread the important stories and messages you want to share with others and hopefully enrich other peoples lives.
If you want to get in contact with me, the links are down below, just drop me a message and I’ll respond as quickly as I can.
Have fun writing everybody. See you. Bye.




Have you tried the iOS version of Scrivener yet? What do you like best about it?
I agree that Scrivener is awesome and can really make a positive difference.
I think the sync capacity between the desktop version and iOS is really awesome indeed. I’ve heard some great stories about people writing away at home, before taking their iPad out and then carrying out an edit in their favorite coffee shop environment.
There can be a bit of a learning curve with Scrivener, so if anyone is having trouble getting going, http://scrivenerville.com/ is a pretty cool place to check out. It has some Scrivener discounts, coupons, templates etc. which can really help people get going.