If you are working with big Scrivener projects that have a multi-level hierarchy of documents, the compile process can become quite tricky when you try to figure out how to set up the formatting hierarchy correctly.
You need to choose which level of documents will compile your titles, text, notes, synopsis and more. Since Scrivener has so many possibilities of adjustments, sometimes the result is not exactly what we want it to be on the first few rounds of compiles.
But don’t worry…
It’s really simple. Once you understand how this hierarchy works it will be easy for you to compile even complicated projects with many, many levels of different documents.
Should you not be familiar with Scrivener: it’s a very powerful non-linear writing software, allowing you (besides a ton of other features) to create and order a multitude of files into any order you like. So, while you’re always working with one file in Microsoft Word and other writing software suites, Scrivener allows you to work with a virtually endless number of files and then compile them in a variety of formats.
Alright, here we go…
Here’s how it works
Go to the compile dialog and click on “Formatting”. You see this.
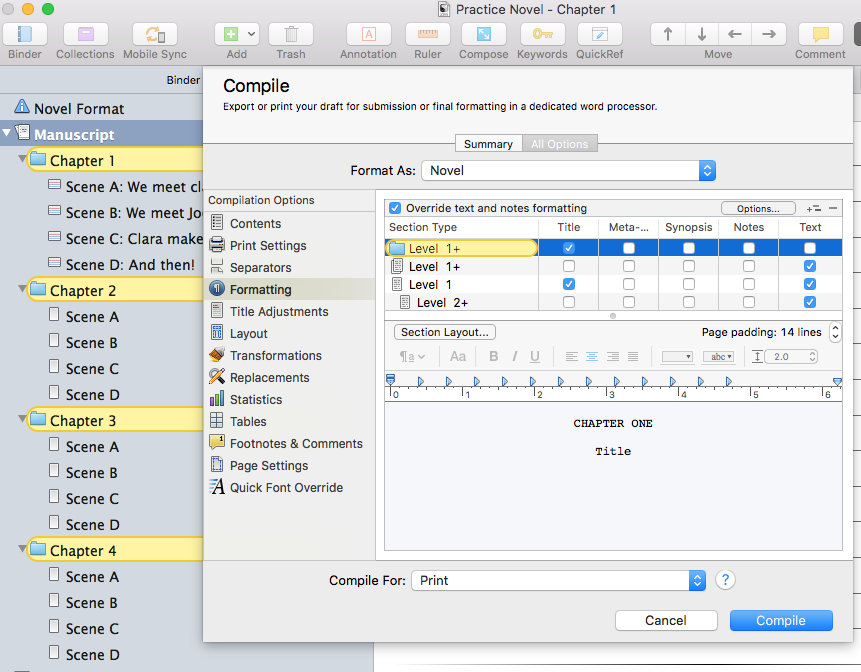
You can set different kinds of format settings for every type of file (folders, files with subdocuments, files without subdocuments), and choose what kind of content you want to compile (Title, Meta-Data, Synopsis, Notes, Text).
So far so good. The example in the picture above is quite a simple one. It has only 1-2 hierarchy levels. But what if you have a multitude of subfolders and subdocuments?
Let’s have a look at this:
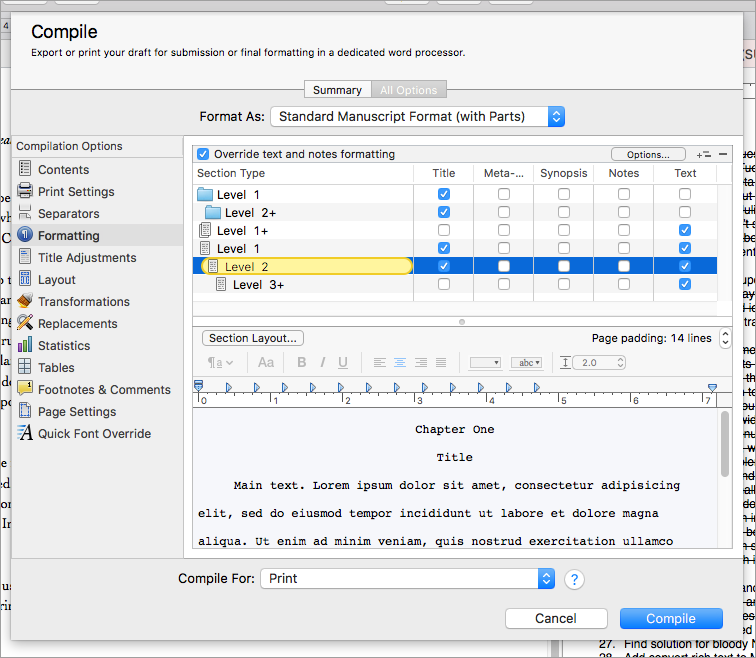
Now we have four levels of folders, four levels of documents with subfolders, and four levels of documents without subfolders.
BTW, you can add and subtract levels by clicking on the “+” and “-” buttons in the top right corner. E.g. If you want to add a level of folders, click on the folder and then on the “+”.
The important thing here is this:
Notice the “+” sign next to the level 4? This means whatever settings you use here, Scrivener will use those settings for level 4 and ALL LEVELS underneath.
This means: your font settings for level four will also be applied to levels five, six, and so on. So, if you have six levels of documents, but all have the same font settings, you don’t have to adjust the settings for six levels here. “Level 1+” will adjust them for you on level one and ALL LEVELS underneath, now matter how many.
How do you know which of your documents is on which level?
The way Scrivener counts the levels is this:
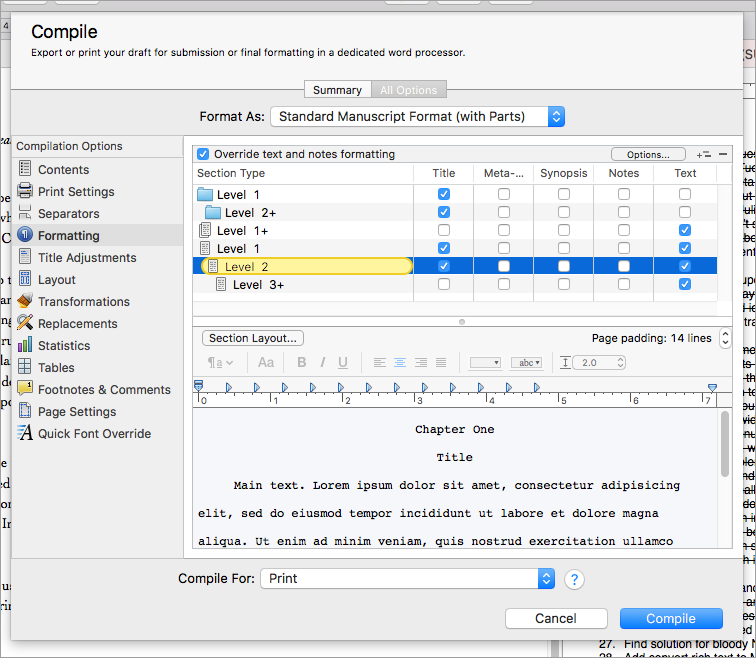
As you can see, the levels are counted globally, NOT PER TYPE OF DOCUMENT. To help you with choosing the levels, Scrivener colours the level you are working on in your binder when you click on the type of document you want to adjust.
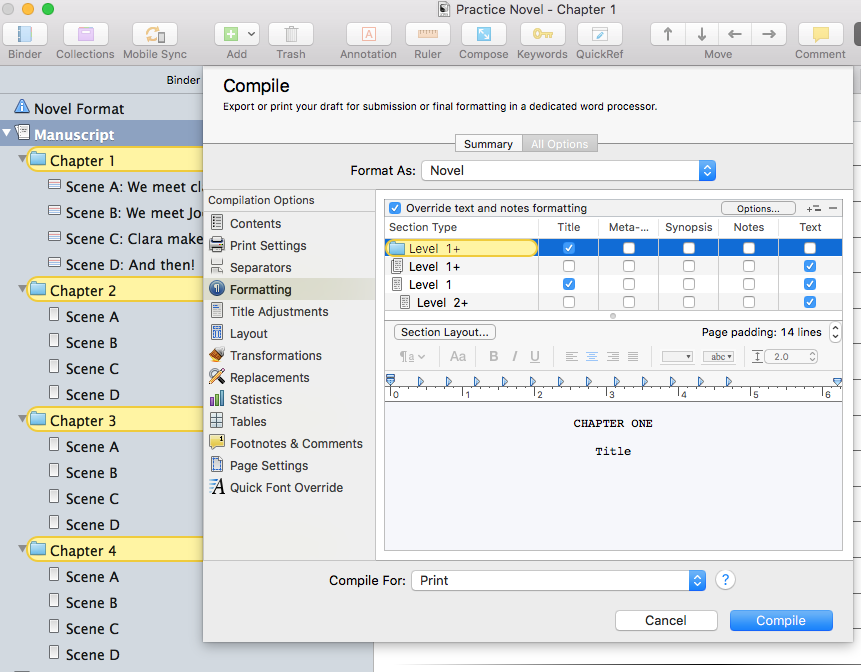
In this example, Scrivener compiles ALL the folders with the compile settings for level one, because “Level 1+” affects level one and all levels underneath.
If we add extra levels to give them different font settings, we see this:
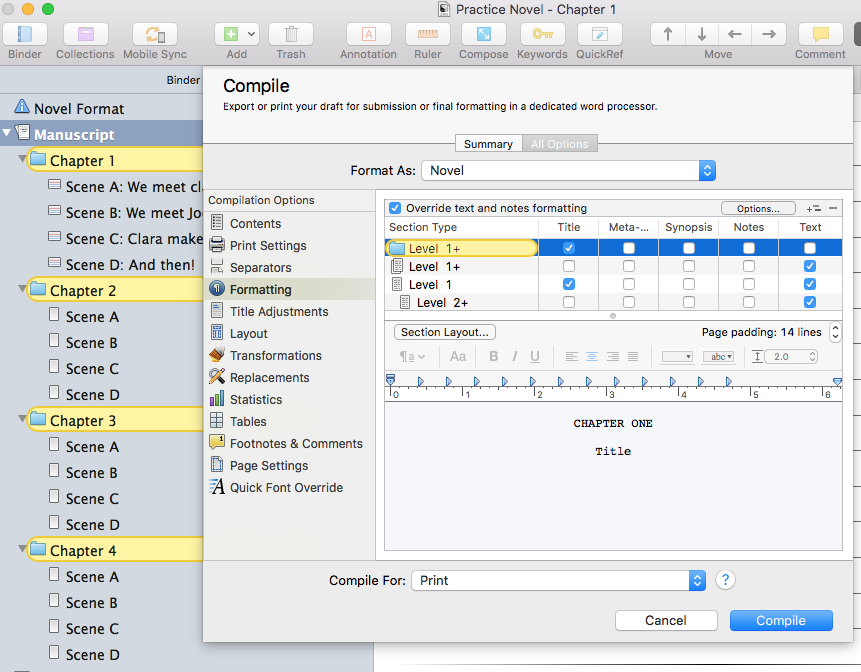
Here, only the document on level three is adjusted, not the one on level four.
I hope this helps you understand this font settings dialog better. If you get the hang of it this gives you really flexible compiling possibilities. One of the big strengths of Scrivener.
How are you using these settings? What different kinds of documents are you creating with this? Leave me a note, I’m curious to find out…


